First Noodle Test: Crafting Authentic Nam Định Phở in Japan
March 9, 2025
First Noodle Test: Crafting Authentic Nam Định Phở in Japan
The Rice Dilemma
At the core of Phở Cồ—and any truly great Pho—lies the noodle. It’s non-negotiable: the noodle must be perfect. Authentic Nam Định Pho demands flat, chewy noodles with just the right bounce, sturdy enough to dance in steaming broth without falling apart. The secret? The rice.
In Vietnam, it’s simple. We use long-grain, non-glutinous rice—think Indica varieties with high amylose content. This starch gives noodles their firm, non-sticky charm. But in Japan, the rice game shifts. Most options here are short-grain Japonica—sticky, low in amylose, and ideal for sushi, not Pho. Finding the right rice became my first hurdle in bringing the best Pho from Nam Dinh to Tokyo.
Scouting Rice in Tokyo
I knew Japanese rice wouldn’t cut it, so I ventured to a Thai-Asian grocery near Shinjuku Station—a treasure trove for expats craving home flavors. There, I scored two bags of Thai Jasmine rice from brands I’d spotted in Vietnam: Golden Phoenix and Three Ladies. Jasmine rice, with its fragrant allure and decent amylose levels, felt like a promising start for Pho noodles.
The Experiment: Rice to Noodles, Step by Step
Here’s how my first noodle-making attempt unfolded:
-
Soaking the Grain: I soaked the Jasmine rice overnight in cool water—12 hours—to soften it up. The kitchen filled with a faint, nutty aroma as the grains swelled.
-
Rinsing Clean: Next morning, I drained and rinsed the rice until the water ran clear, washing away excess starch to keep stickiness at bay.
-
Blending Blues: Using my trusty home blender, I aimed for a silky batter. Disaster struck—tiny rice grains lingered like stubborn pebbles, even after 10 minutes. I strained it through a fine mesh, but the batter stayed gritty. Lesson one: I need a high-powered grinder.
-
Batter Rest: I let the strained mix sit for 30 minutes. Bubbles fizzed out, and the starch settled, promising a smoother finish.
-
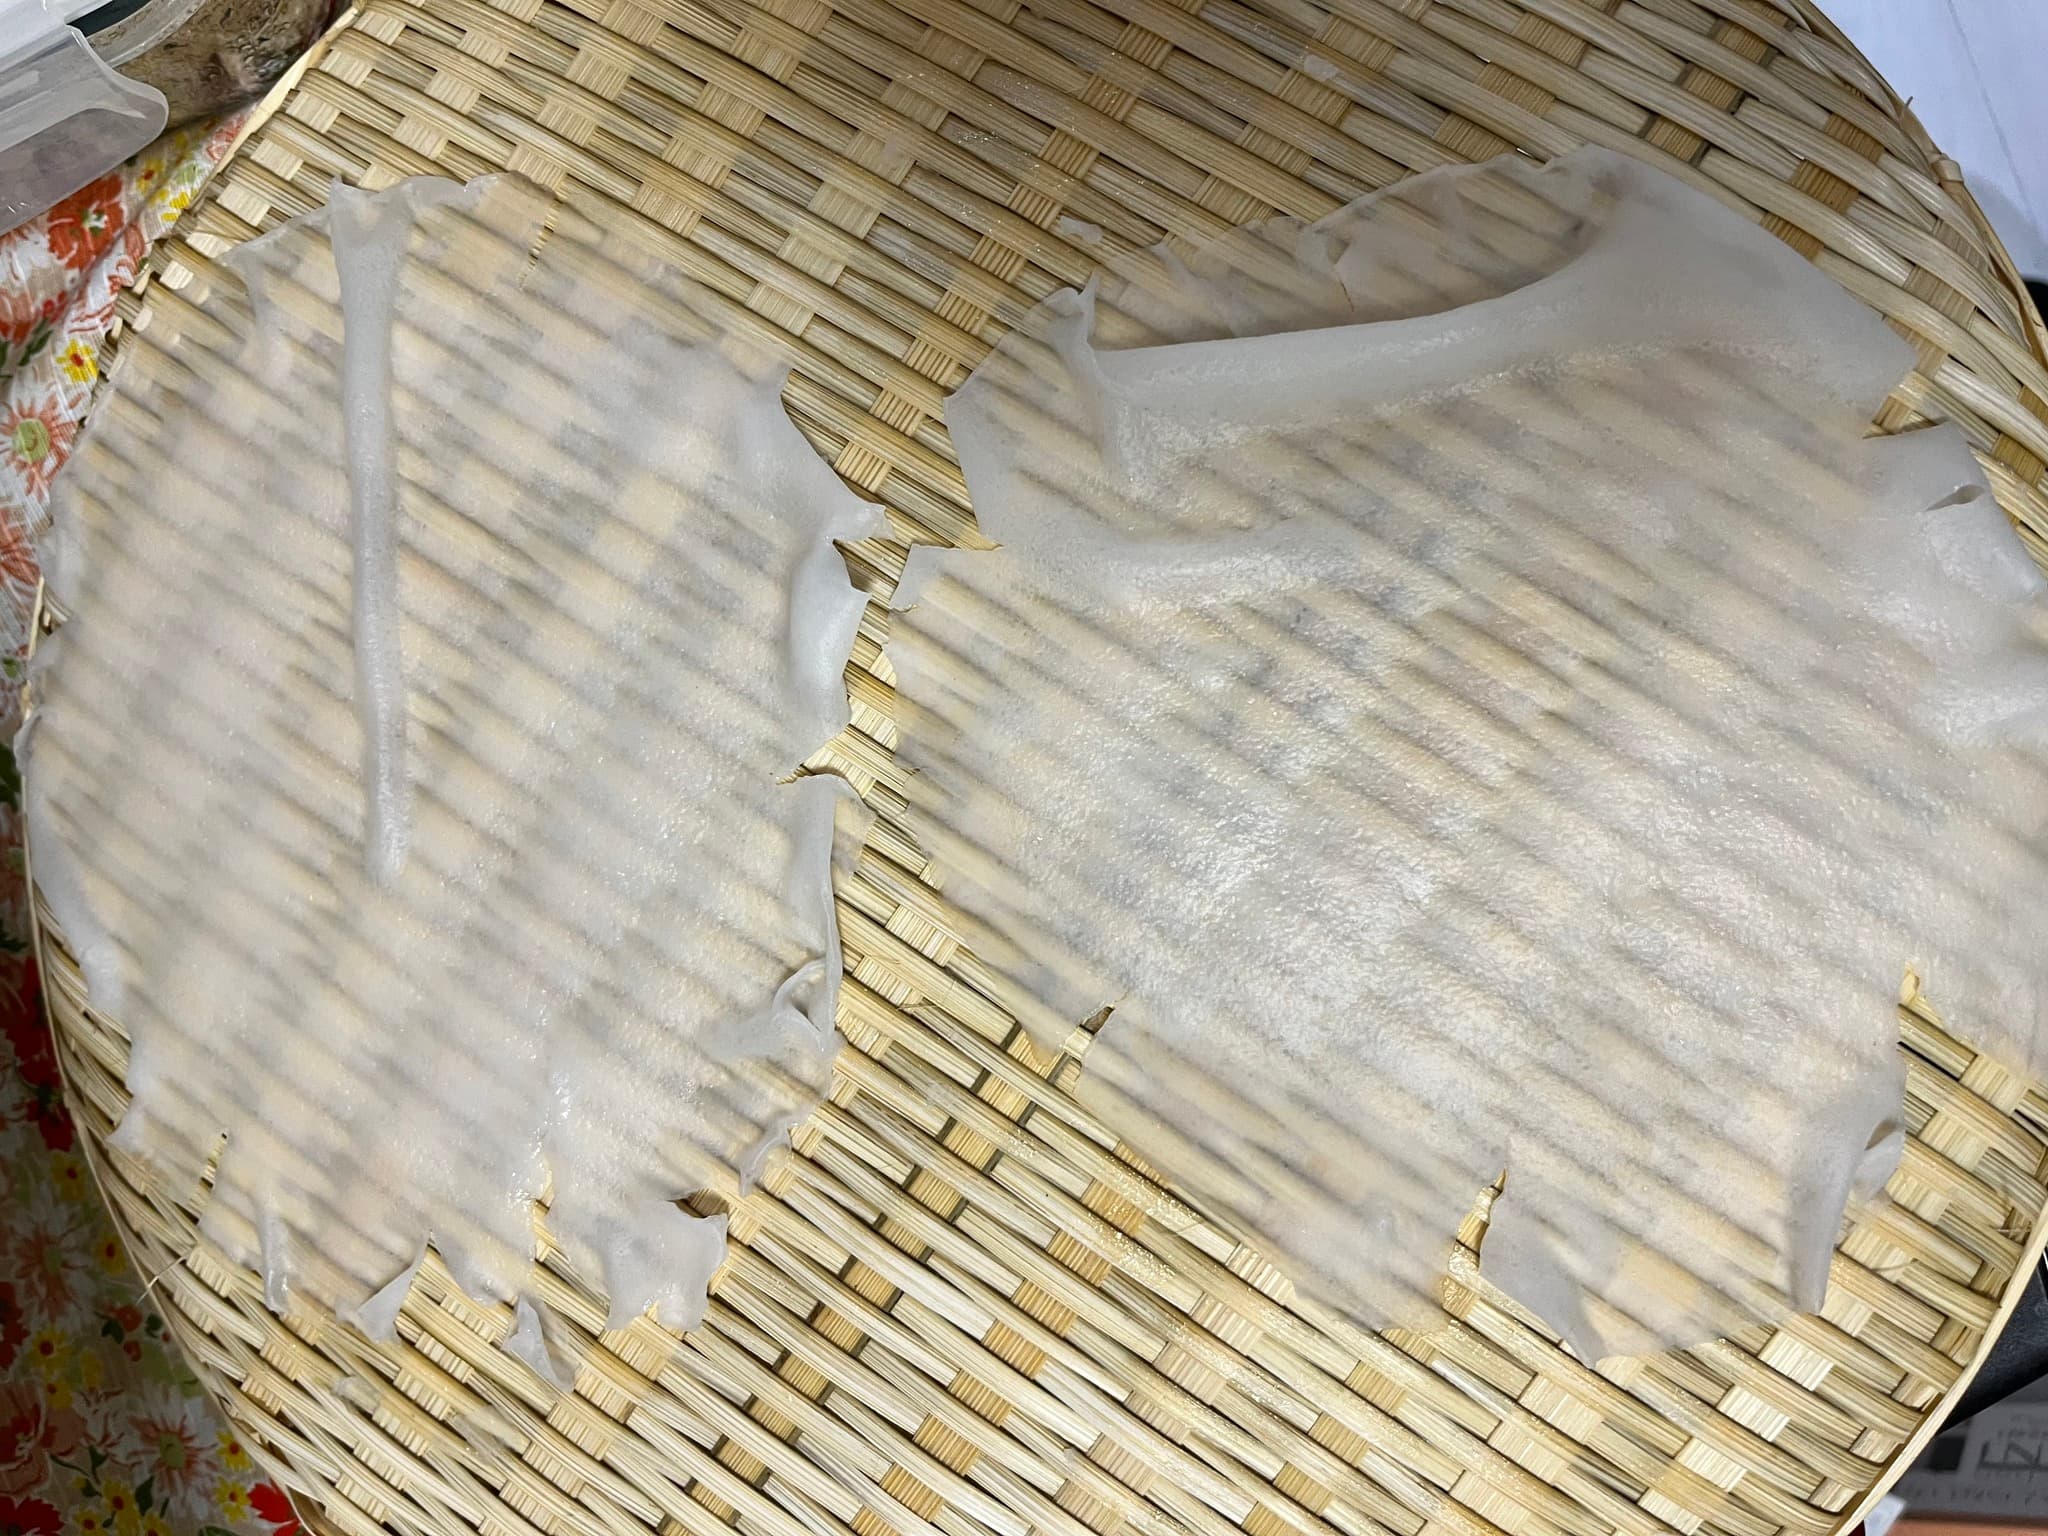
Steaming, DIY-Style: No fancy Pho steamer? No problem. I grabbed cheap cotton cloth from a 100-yen shop, stretched it taut over a pot of boiling water, and got to work. Steam rose like a warm hug from home.
-
Thick Mishap: My first pour was too generous. After 5 minutes, the noodle sheet emerged thick and fragile, crumbling like wet paper. Rookie mistake!
-
Thin Success: I adjusted—less batter, spread thin and fast. Five minutes later, I had translucent, chewy sheets that held their own. Not perfect, but closer to Nam Định’s soul.
-
Drying Drama: I hung the sheets to dry, a small fan whirring to help. Space was tight, so I stacked them too soon—big error. They fused into a sticky mess.
-
The Verdict: Cutting revealed a gooey tangle. In hot broth, they disintegrated—far from the resilient chew I craved. First try: a delicious failure.
What I Learned—and What’s Next
This test wasn’t the best Pho noodle victory, but it was a goldmine of lessons:
- Gear Up: My blender’s a bust—I need a rice grinder for that velvety batter.
- Thin is In: Less batter, spread quick, nails the texture.
- Dry Right: Sheets must dry fully before stacking—I’ll rig a better setup.
- Rice Hunt Continues: Jasmine’s a solid base, but I’ll test other long-grain blends for the ultimate chew.
- Tweak the Mix: A slight water-to-rice tweak might smooth things out.
Next up: Noodle Test #2. I’m sourcing a grinder, refining my DIY steamer, and hunting new rice. The quest for authentic Nam Định Pho noodles in Japan rolls on—stay tuned!
What noodle-making tricks have you tried? Share your wisdom below!